Bypass Tailscale installation via VM
Picture this: you’re sitting in a coffee shop with your lightweight MacBook, but you need the raw power of your beast desktop at home for some heavy lifting. For months, I’ve been living the dream with Tailscale - a magical VPN that makes my home PC feel like it’s right next to me, no matter where I am in the world.
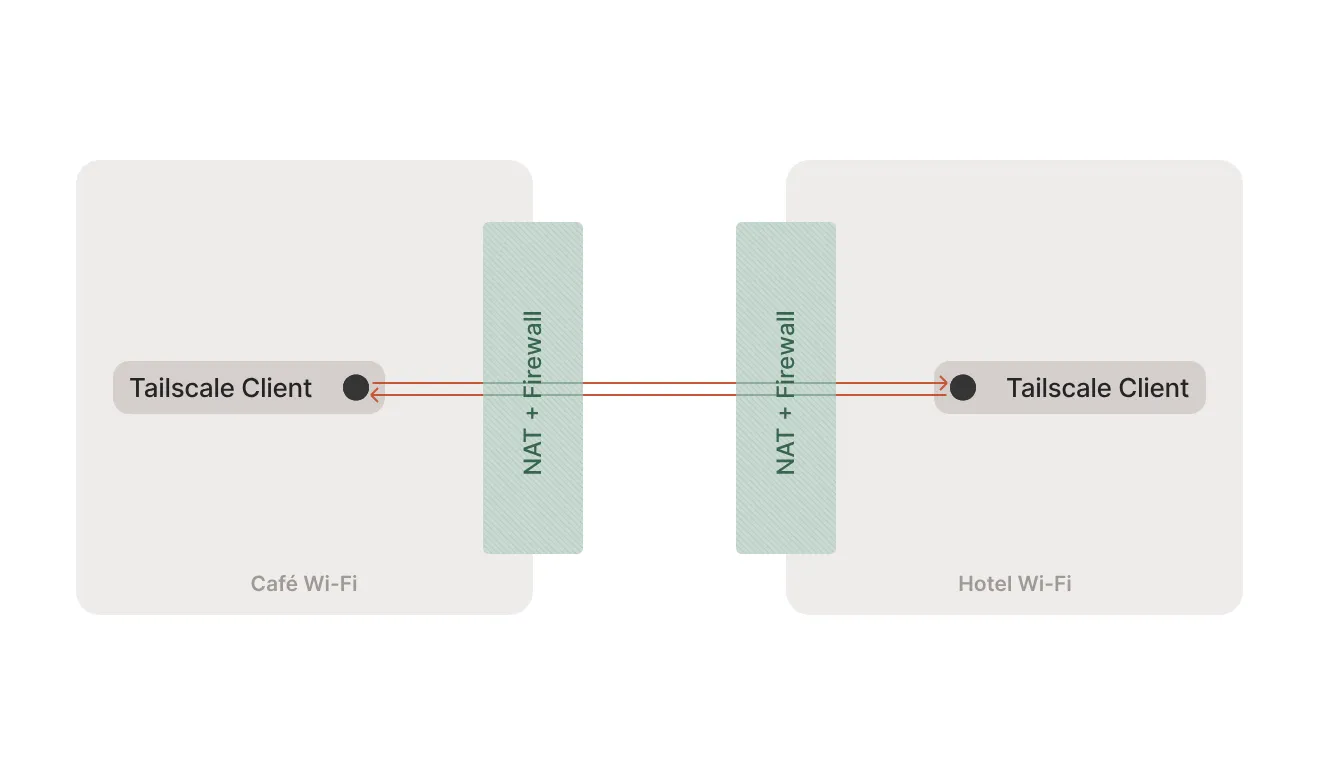
When Things Go Wrong
One fine morning, my MacBook completely blocked Tailscale. No warning, no explanation - just pure networking chaos. My precious remote development setup was gone, and I was back to being stuck with whatever my MacBook could handle.
The “Aha!” Moment
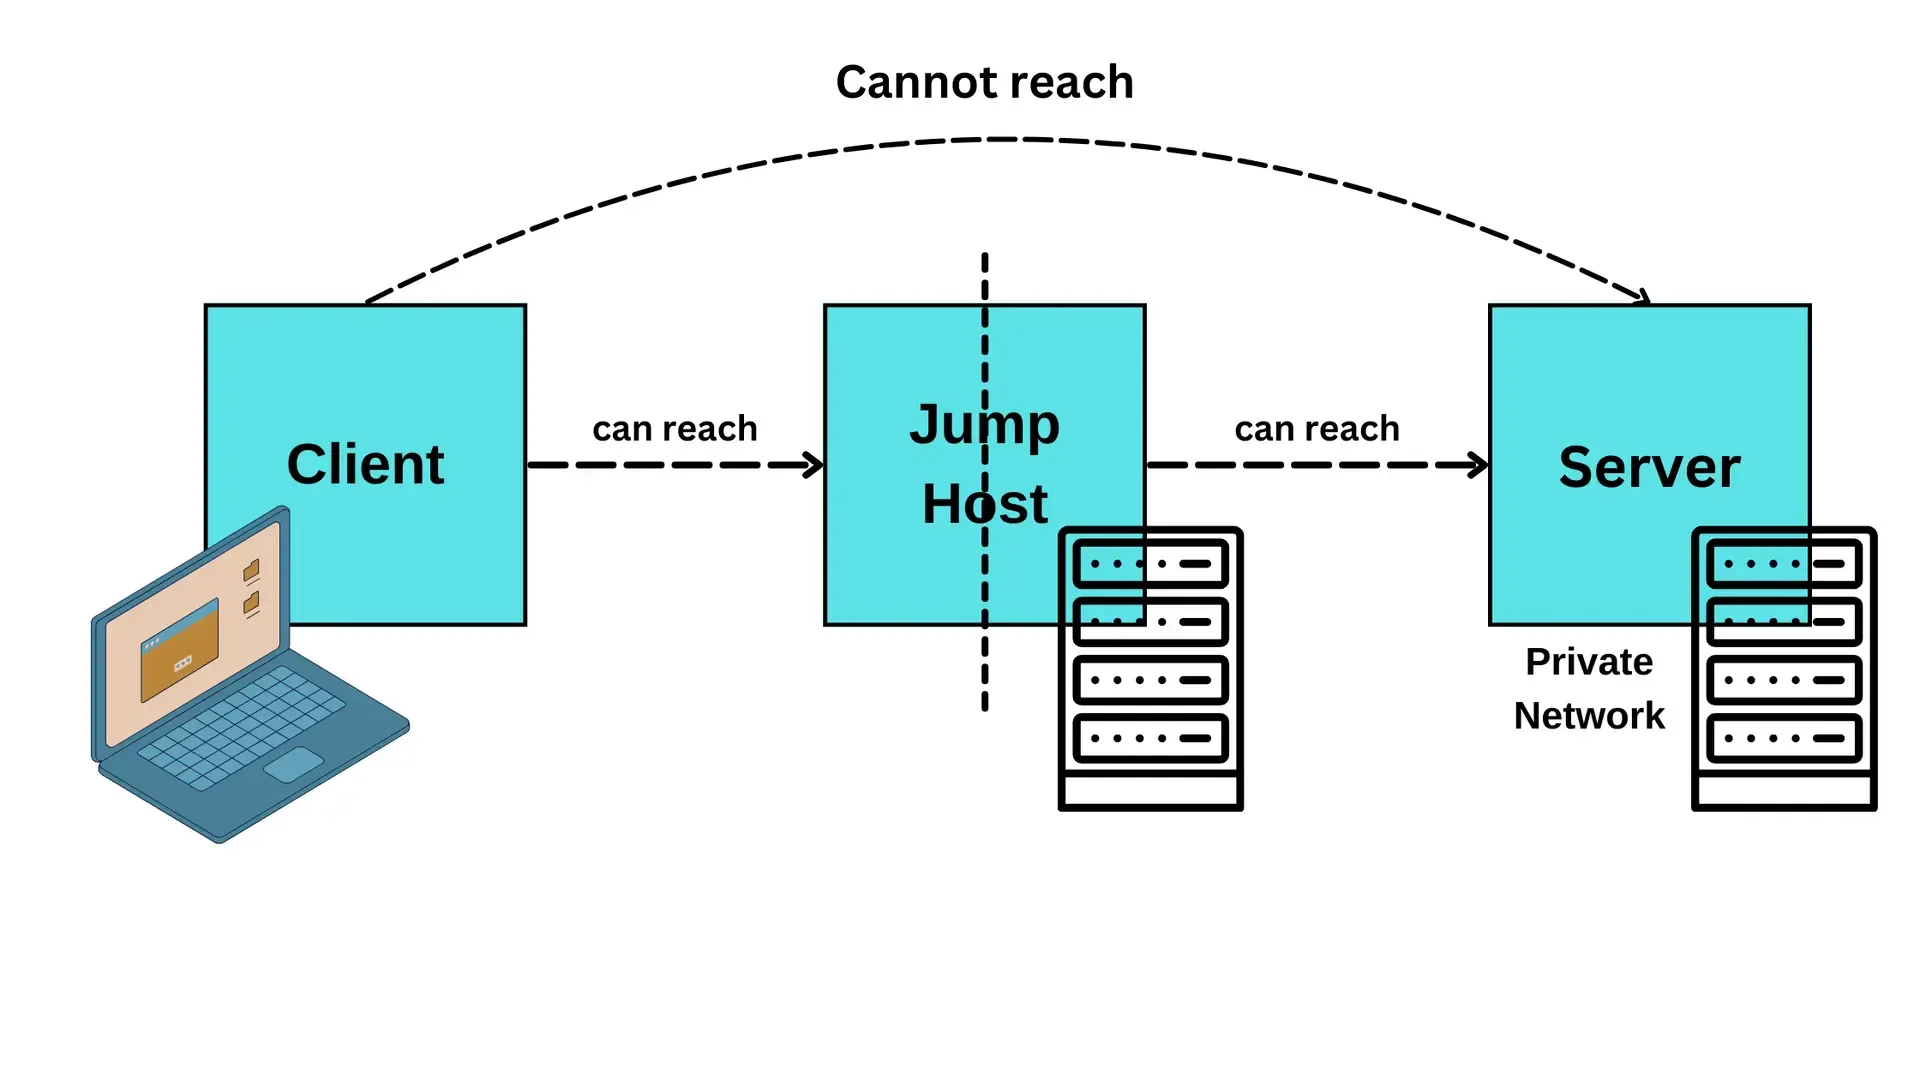
After some desperate googling and a few cups of coffee, I had an idea: what if I could sneak Tailscale through a VM? Think of it like using a friend’s phone when yours is acting up. The plan was simple:
- Spin up an Ubuntu VM that can run Tailscale
- Use SSH magic to hop through the VM to reach my home PC
- Make it all seamless so VSCode doesn’t even know what’s happening
The secret sauce? SSH ProxyJump - basically telling SSH “hey, take a detour through this VM to get to my real destination.”
The Setup
What You’ll Need
- Host: macOS with OrbStack (or any Docker environment)
- VM: Ubuntu with Tailscale and SSH server
Getting the VM Ready
First, let’s get Tailscale running in the Ubuntu VM. The official docs make this pretty straightforward:
# Get Tailscale's signing keys and repo
curl -fsSL https://pkgs.tailscale.com/stable/ubuntu/jammy.noarmor.gpg | sudo tee /usr/share/keyrings/tailscale-archive-keyring.gpg >/dev/null
curl -fsSL https://pkgs.tailscale.com/stable/ubuntu/jammy.tailscale-keyring.list | sudo tee /etc/apt/sources.list.d/tailscale.list

# Install and start Tailscale
sudo apt-get update && sudo apt-get install tailscale
sudo tailscale up  # This will ask you to authenticate in a browser
tailscale ip -4    # Check your new Tailscale IP
Next, we need SSH access to the VM:
# Install SSH server
sudo apt update && sudo apt install openssh-server -y
sudo systemctl enable ssh && sudo systemctl start ssh
The Magic SSH Configuration
Here’s where the real magic happens. Edit your ~/.ssh/config file:
# The VM
Host vm
  Hostname 127.0.0.1
  Port 32222
  User <username>
  IdentityFile ~/.orbstack/ssh/id_ed25519
  IdentitiesOnly yes
  ProxyCommand '/Applications/OrbStack.app/Contents/Frameworks/OrbStack Helper.app/Contents/MacOS/OrbStack Helper' ssh-proxy-fdpass 501
  ProxyUseFdpass yes

# The final destination (your home server)
Host server-mac-mini
    HostName server-mac-mini
    User <server_username>
    Port 22
    ProxyJump vm  # ← The magic line here
That ProxyJump vm line is doing all the heavy lifting - it tells SSH to connect to the VM first, then jump to your home server from there.
The Moment of Truth
Now for the ultimate test:
ssh server-mac-miniIf everything works, you should land directly on your home server, even though you’re secretly bouncing through the VM!

Why This is Actually Pretty Cool
This setup is more than just a workaround - it’s genuinely useful! Once configured, VSCode Remote, git operations, and any SSH-based tools work exactly like before. Plus, if you ever run into similar networking restrictions (hello, corporate firewalls!), you’ll know exactly how to dance around them.
The best part? Your VM becomes a little networking Swiss Army knife that you can use for all sorts of creative routing solutions.